

When building a home or small structure, choosing the right foundation is essential. A floating concrete slab has become a popular choice for its affordability, simplicity, and quick installation. This type of foundation involves pouring a concrete slab directly onto the ground without the need for deep footings.
In this article, we’ll explore the floating concrete slab completely, its pros and cons, installation process, and costs, and help you decide if it’s the right choice for your project, whether it’s for a shed, garage, or small residential home.
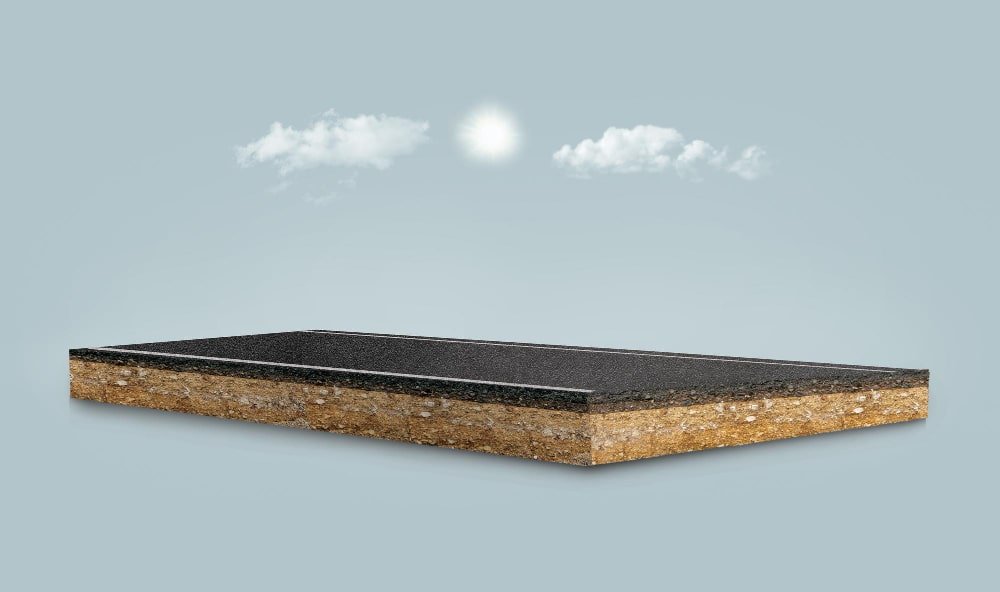
A floating concrete slab is a type of foundation where the concrete slab “floats” directly on the ground without being anchored or attached to the walls of the structure. Unlike traditional foundations, it does not require deep footings or crawl spaces. This makes it a cost-effective option for small to medium-sized structures.
This foundation is ideal for buildings in areas with stable, flat soil conditions. It’s commonly used for detached garages, garden sheds, and some residential homes. The design of the floating concrete slab allows for slight movement in the slab, which is especially beneficial in areas with fluctuating ground temperatures or shifting soil.
Floating concrete slabs offer several benefits, making them an attractive choice for certain construction projects. Here are the key advantages of using this type of foundation:
Floating slabs are generally less expensive to install compared to other types of foundations. The simpler design requires fewer materials and less labor, saving homeowners money on construction costs.
Since floating slabs do not require deep footings or complex preparations, they can be installed quickly. This can speed up your construction timeline, allowing you to move forward with your project faster.
Floating concrete slabs generally require less upkeep. There are fewer places for water to accumulate, reducing the risk of mold or moisture damage that can affect other types of foundations, such as crawl spaces or basements.
The compact design of a floating slab minimizes air leakage and improves insulation, making it easier to regulate indoor temperatures. This can help reduce heating and cooling costs over time.
Since floating slabs require minimal excavation and use fewer materials, they are considered a more environmentally friendly option. They can be especially useful for building on uneven terrain or in areas where traditional foundations might be less feasible.
While floating concrete slabs come with several benefits, they also have their drawbacks. Here are some of the disadvantages to keep in mind before deciding if this is the right choice for your project:
One of the main disadvantages of a floating concrete slab is its long-term durability. Over time, shifting soil or ground movement can lead to cracks or instability.
Floating slabs are less robust than other foundations, especially when subjected to significant weight or stress.
Floating slabs can be more susceptible to moisture issues, especially if proper drainage is not in place. Since they sit directly on the ground, water can seep up through the slab, leading to mold growth or weakening of the concrete. Proper insulation and moisture barriers are essential to prevent these issues.
While floating slabs work well for small, single-story structures like sheds and garages, they may not be appropriate for larger, more complex buildings.
They lack the structural depth and reinforcement needed to support heavier loads, making them unsuitable for multi-story or commercial buildings.
Floating concrete slabs do not allow for underground access to utilities, which can be a disadvantage if you need to install plumbing, wiring, or heating systems beneath the floor.
This limitation can add complexity and cost if you need to incorporate utilities into the foundation.
The cost of installing a floating concrete slab foundation varies based on factors such as size, thickness, reinforcement, and local labor rates.
On average, homeowners can expect to pay between $6 and $14 per square foot for a standard slab foundation.
For a 1,500-square-foot home, this translates to a total cost ranging from $9,000 to $21,000. Additional expenses may include:
It’s important to note that these figures are approximate and can vary based on regional pricing, site conditions, and specific project requirements. Consulting with local contractors can provide a more accurate estimate tailored to your specific project.
A floating concrete slab is a type of foundation where the concrete slab rests directly on the ground without being anchored to the walls or deep footings. It is commonly used for smaller structures like garages, sheds, or additions that do not require heavy support.
Pros | Cons |
Cost-Effective: Lower installation costs due to minimal excavation. | Not Suitable for Large Buildings: Lacks the strength needed for multi-story or heavy buildings. |
Quick Installation: Faster to install compared to traditional foundations. | Moisture Risk: Can be vulnerable to moisture issues if drainage is inadequate. |
Low Maintenance: Requires less upkeep compared to other foundation types. | Limited Durability: Can suffer from cracks or instability over time due to shifting soil. |
A monolithic slab combines the foundation’s footing and slab into one single concrete pour. This method provides a strong, integrated structure suitable for a wide range of buildings, especially where the ground conditions are unstable.
Pros | Cons |
More Stability: Slab and footing are integrated, making it more stable. | Higher Cost: More expensive due to the need for additional materials and labor. |
Suitable for Unstable Soil: Great for shifting or unstable soils as it offers more stability. | Longer Construction Time: Takes longer to install due to the complexity of preparation. |
Durability: Provides excellent strength and resistance to cracking. | More Complex Installation: Requires precise planning and additional labor. |
This type of foundation involves pouring footings separately from the slab, which supports the structure. It is one of the most common foundation types, typically used for larger homes and multi-story buildings.
Pros | Cons |
Strong Support: Ideal for heavy or multi-story buildings. | Higher Costs: Requires more materials and labor for excavation and installation. |
Durable: Provides a long-lasting and secure foundation. | Complex Installation: Requires precise planning and more time to install. |
Prevents Settling: The footings ensure minimal settling over time. | More Excavation Needed: Requires significant excavation work. |
A crawl space foundation elevates the building above the ground by creating a small space between the structure and the soil. This space is accessible and often used for utilities, wiring, and plumbing.
Pros | Cons |
Easier Access to Utilities: Provides easier access to plumbing and electrical systems. | Higher Cost: Involves more materials and labor for excavation and structural support. |
Flood Protection: Elevated above the ground to prevent flooding. | Moisture Issues: Can accumulate moisture, leading to mold and mildew problems if not sealed properly. |
Improved Ventilation: Enhances airflow beneath the building. | Complex Construction: More complex to build compared to other foundations. |
Maintaining a floating concrete slab foundation is crucial for its longevity and overall stability. Since this type of foundation rests directly on the ground without being anchored to the walls or footings, it is more susceptible to certain issues like cracking, moisture accumulation, and soil movement. However, with proper care, these problems can be minimized.
Regularly inspecting your floating concrete slab foundation helps detect early signs of damage, such as cracks or moisture buildup. It is important to check for these issues at least twice a year, especially after heavy rainfall or during changes in temperature.
One of the biggest risks to floating concrete slabs is water damage. Poor drainage can lead to moisture pooling underneath the slab, which can cause the concrete to weaken over time.
Ensuring that water drains away from the foundation will help protect the slab from moisture-related issues.
Cracks in a floating concrete slab can lead to further structural damage if not addressed quickly. Water can seep through these cracks, which can weaken the foundation. Sealing cracks with concrete filler or epoxy as soon as they appear helps to maintain the integrity of the slab.
Extreme weather, including freezing temperatures and excessive heat, can have a negative impact on floating concrete slabs. In cold climates, the freeze-thaw cycle can cause the slab to shift and crack. In hot climates, the concrete may expand, leading to structural issues.
Soil movement is another common problem for floating concrete slabs. This is especially true for areas with unstable or expansive soils. Over time, soil erosion, compaction, or shifting can cause the slab to crack or settle unevenly.
If you’re planning to build a structure like a garage, shed, or an extension to your house, a floating concrete slab foundation is a great option. It’s simple, cost-effective, and can be done in several steps.
Let’s walk through this process together so you can feel confident and prepared to tackle it!
First things first, you’ll need to clear the area where you want to pour your floating slab. Make sure there’s no debris, vegetation, or any old structures in the way. You want a clean and level area, so it’s time to grab your shovel (or maybe a small backhoe if you have access to one) and dig out any uneven spots.
This is also when you’ll set the stage for good drainage. It’s essential to create proper drainage channels around the perimeter of the slab. This will prevent water from pooling underneath your foundation and causing future issues.
Now that the site is cleared and leveled, you’ll need to lay a gravel base. Think of this as creating a sturdy foundation underneath your slab. This gravel base will help with drainage and also provide a solid, compact surface for the slab to rest on. Pour and spread the gravel evenly, then use a compactor to make sure it’s nice and firm.
Once your gravel base is in place and compacted, it’s time to strengthen your foundation with rebar or wire mesh. This reinforcement is critical to prevent cracking later on. You’ll want to position the rebar or mesh in the center of where the slab will be poured, so it’s well-supported throughout.
Tip: You can use rebar chairs or spacers to make sure your reinforcement stays in place as you pour the concrete.
Next, you’ll need to set up the formwork. This is like the mold that holds the concrete in place while it cures. You’ll create this formwork using wooden boards or metal forms. Make sure the forms are level and properly aligned; if they’re even a little off, the final slab might not be as stable or attractive as you’d like.
Here’s the fun part: pouring the concrete! First, make sure the concrete mix is ready to go. Depending on how much you’re pouring, you’ll either mix it yourself or have it delivered from a batch plant.
Start pouring the concrete from one end of the form and work your way across, making sure to fill the whole space.
As you pour, use a shovel or rake to spread it out and make sure it’s evenly distributed. If you’re pouring a large slab, you might need help to keep everything flowing smoothly.
Once the concrete is poured, it’s time to level it out. You can use a straightedge (a long, flat board works great) to level off the surface, moving it back and forth across the slab. This step is important because you want the concrete to be as smooth and even as possible before it starts setting.
After you’ve leveled the concrete, it’s time for some fine-tuning. Use a bull float to smooth out the surface. This will give it a nice, even finish and remove any high spots. The bull float is a long, flat tool that’s perfect for this job.
Now that the slab is looking good, you need to let it cure. This is a slow process, so be patient! Cover the slab with plastic sheeting or use a curing compound to keep the moisture in and help the concrete set properly. Curing the slab for at least 7 days (or as long as recommended) is important to ensure it reaches maximum strength.
After the concrete has cured, inspect the slab. Check for any cracks or areas that may have settled unevenly. If you notice any minor cracks, it’s a good idea to seal them before they get worse.
At PGH Concrete Masters, we offer expert concrete services, including floating concrete slab foundations, stamped concrete, and reliable concrete repairs for homes and businesses, primarily in Pittsburgh, PA. Our team ensures every project is completed with precision and satisfaction.
Our Key Services Include:
Get in touch with us today to get your project started with the best concrete services!
How Many 4x6x4 Concrete Slabs Could Be on Full Load?
The number of 4x6x4 concrete slabs that can be on full load depends on the weight of a single slab and the load capacity of the vehicle or platform.
A single 4x6x4 slab weighs approximately 1,188 pounds (based on the standard weight of concrete at 150 pounds per cubic foot). To calculate the total, divide the maximum load capacity of your vehicle or platform by 1,188 pounds.
For example, if your truck’s full load capacity is 10,000 pounds, it could carry around 8 slabs. Always account for safety margins and local weight regulations during transportation.
Are Concrete Slabs Good for Patios?
Yes, concrete slabs are an excellent choice for patios. They offer a durable, low-maintenance, and versatile surface that can withstand heavy foot traffic and weather conditions.
Concrete can also be customized with finishes like stamping, staining, or polishing to match your patio’s aesthetic. With proper installation and sealing, concrete patios provide long-lasting beauty and functionality.
Can a floating concrete slab be used for multi-story buildings?
Floating concrete slabs are generally not ideal for multi-story buildings due to their lack of deep support. They are more suitable for smaller structures like sheds, garages, and single-story homes. For larger buildings, a more robust foundation, such as a traditional slab or pier foundation, is recommended to handle the added load.
How do floating concrete slabs perform in areas with freeze-thaw cycles?
Floating concrete slabs can experience movement and cracking in regions with freeze-thaw cycles if not properly insulated or designed with frost protection. To prevent these issues, additional insulation beneath the slab can help mitigate the effects of freezing and thawing on the slab’s integrity.
Can a floating concrete slab be used for a home addition?
Yes, a floating concrete slab can be used for home additions, especially if the addition is a single-story structure with moderate load requirements. It is cost-effective and easy to install compared to traditional foundations. However, for more complex or multi-story additions, a deeper foundation may be required for better stability.
